If your Jolla is not starting up normally or not starting up at all, you can attempt to fix your device with the help of the Recovery Mode. This article will provide you with step-by-step instructions on recovering a malfunctioning device.
NOTE: This article is for Jolla Phone (Jolla 1) only. There are separate articles for other Sailfish devices:
- Xperia 10 II and Xperia 10 III: https://docs.sailfishos.org/Support/Help_Articles/Recovery_Mode/
- Xperia X, XA2, 10: https://jolla.zendesk.com/hc/en-us/articles/360002996893
- Jolla C & Aqua Fish: https://jolla.zendesk.com/hc/en-us/articles/115000663928
- Jolla Tablet: https://jolla.zendesk.com/hc/en-us/articles/208406917
CONTENTS
1 What is Recovery Mode?
1.1 When should I use the Recovery Mode?
2 Setting up Recovery Mode for the first time
2.1 Preparing your Jolla for Recovery Mode
2.2 Preparing your Windows PC for Recovery Mode
2.3 Preparing your Mac (OS X) computer for Recovery Mode
2.4 Preparing your Linux PC for Recovery Mode
3 Fixing your device with Recovery Mode
3.1 Backing up data with Recovery Mode
3.2 Resetting phone to factory settings in Recovery Mode
3.3 Reverting phone back to normal state
1 What is the Recovery Mode?
Recovery Mode is a tool designed to help your device recover from critical errors. It is somewhat "hidden", because you are not meant to have to use it except in case of a rare device malfunction. To use it successfully you need a MicroSD card in your device.
Recovery Mode is considered a last resort before having to send in your device for repair.
It is a powerful tool and using it always means that your data on the device is at risk.
Please read the instructions in this article carefully.
If at any point you are uncertain about using Recovery Mode, please contact us.
1.1 When should I use Recovery Mode?
- You are experiencing problems starting up your device.
- Your device doesn't start past the Jolla logo.
- Your device seems to never complete the startup process, before restarting again (AKA "boot loop", starts up to "Jolla logo" but no further).
- Your device starts up to a state where it is unusable because of a corrupted or not visible user interface.
- Some parts of the Sailfish OS system seem to be missing. For example, opening Settings crashes the phone or Settings opens as a blank screen.
- You were instructed by Jolla's Service & Support personnel to use it.
2 Setting up Recovery Mode for the first time
These instructions are for setting up your Windows, Mac or Linux PC to be able to use Recovery Mode.
2.1 Preparing your Jolla Phone for Recovery Mode
1. Turn off your Jolla device and remove all cables and the battery.
2. Press and hold down the Volume Down button while re-inserting the battery
3. While still holding down the Volume key, press the Power key until Jolla vibrates.
You can now release both buttons. You have now put your device into Recovery Mode.
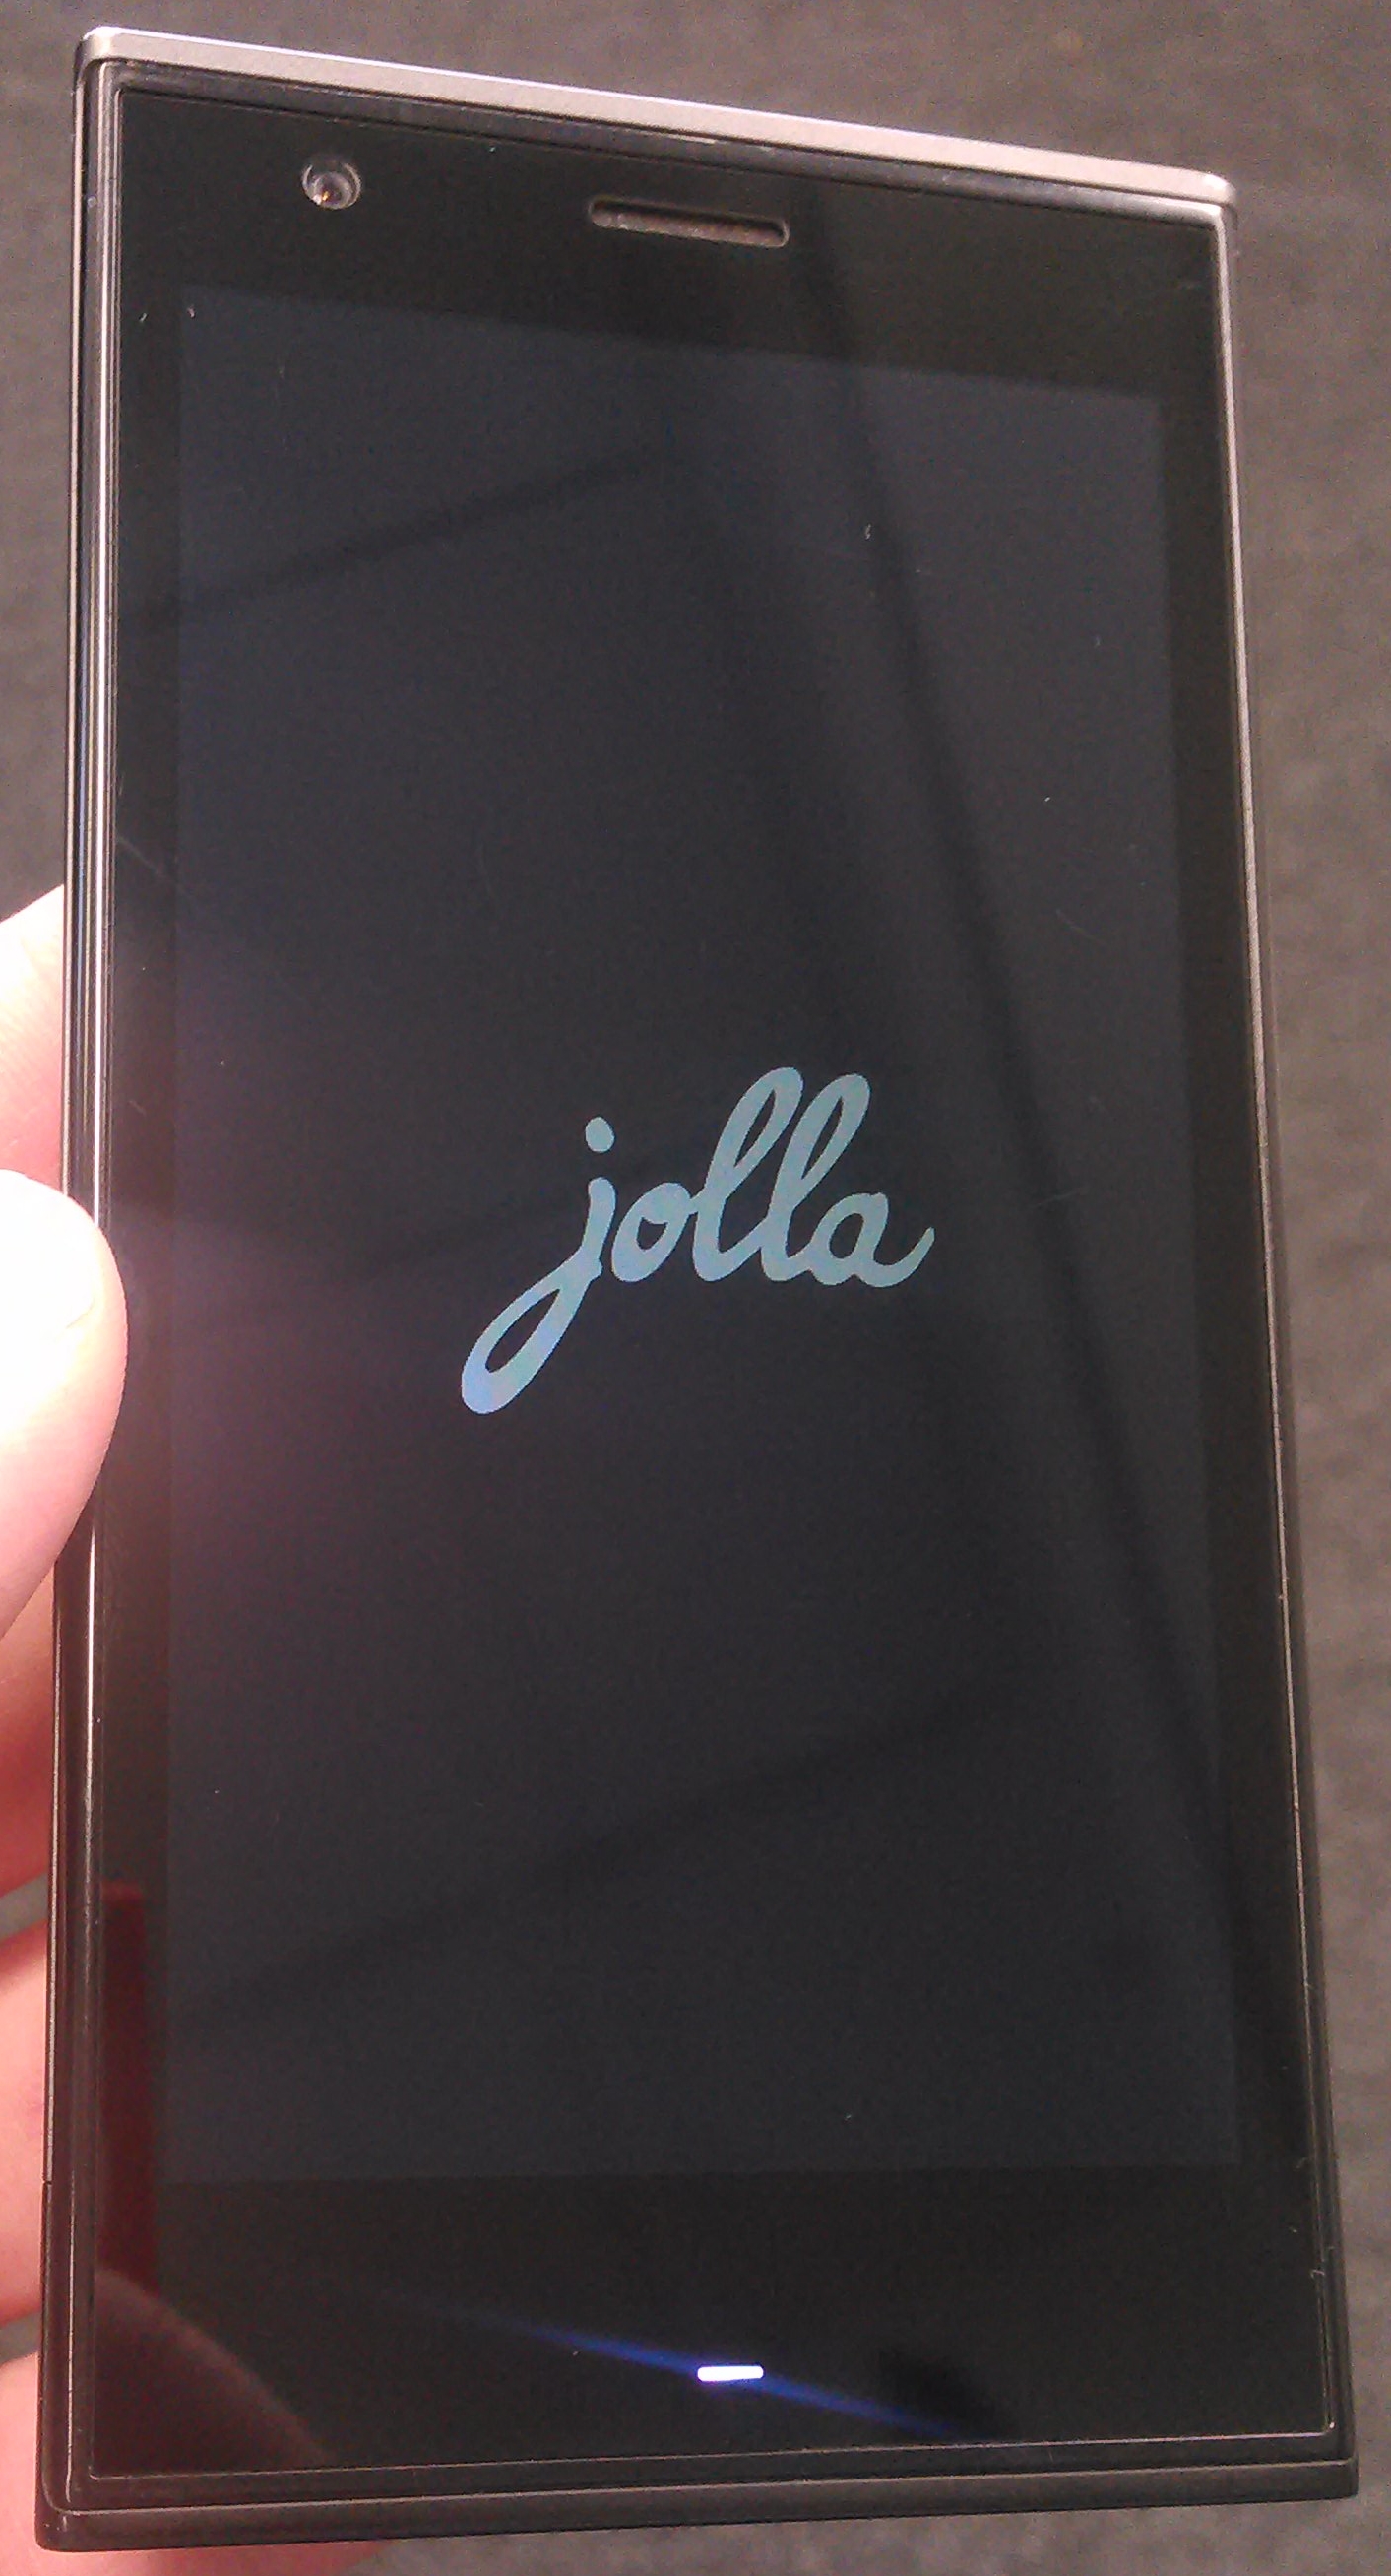
When the phone is in Recovery Mode only the Jolla logo is shown on the display, the LED is constantly on.
Do not worry if the LED turns off - it should turn on again when you connect the USB cable in chapter 2.2 (Windows), chapter 2.3 (Mac) or 2.4 (Linux).
 Putty
Putty
If your phone reads "Fastboot mode" at the top left corner of the screen, your Jolla is in the incorrect mode for Recovery Mode. Please remove the battery and repeat the process described in this chapter.
2.2 Preparing your Windows PC for Recovery Mode:
Do the following to install the "RNDIS drivers” and the terminal application properly. If you have used Recovery mode before and installed RNDIS drivers then they might still be okay. If you cannot set up a telnet connection later on, then it is best to check the drivers.
NOTE: At this point your phone must be in the state that it had when step 2.1 got complete.
1. Connect your Jolla Phone with an USB cable to your computer. While doing this do not press any buttons of Jolla - simply connect the cable.
2. Launch Windows Device Manager
- Windows 7: Open Start Menu and right click on “Computer”. Select “Manage”.
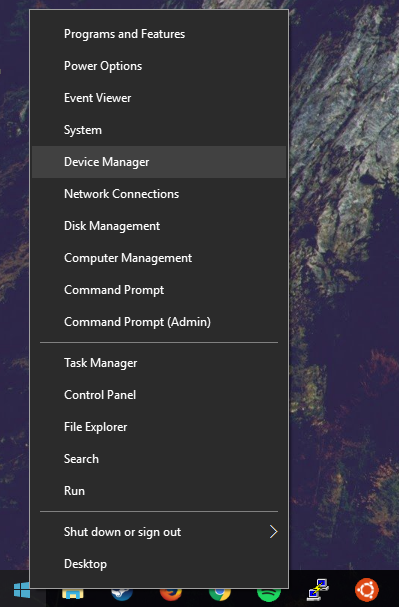
- Windows 10: Open Start Menu and type "device manager". You should see Device Manager in the search list now. Alternatively, r
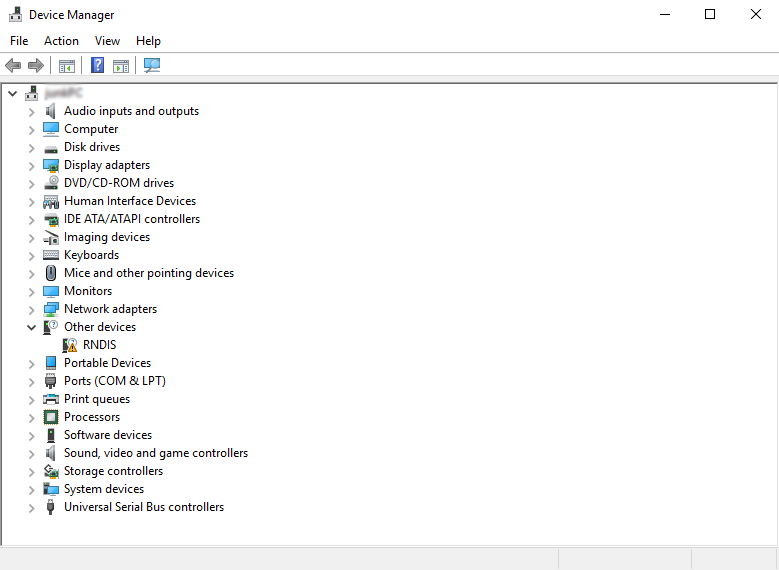
3. Left click on Device Manager and find the Device "RNDIS" under “Other Devices”, equipped with a small triangle. If you do not see it listed, then ensure that you have the item "Remote NDIS compatible device" under "Network adapters" (this implies that the driver should be ok in your computer).
NOTE: Windows keep developing. It may be that you won't find either "RNDIS" or "Remote NDIS compatible device" in the Device Manager of your Windows 10 computer (and who knows about Win 11) - this happened to the author when using Windows 10.0.19043, feature update 21H1 and cumulative update 21H1. In such a case, proceed to steps 10 or 11 below and try your luck with the telnet command. It worked like a charm for the author.
4. Right click on that device and select Update Driver Software.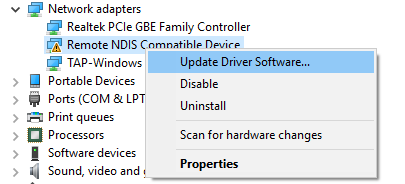
5. When the window pops up (Windows 7 and 8 and 10) select “Browse My Computer” for driver software, then on the next screen, click on the bottom that says “Let me pick from a list of drivers on my computer”.
6. Next you will be asked for the device type. Here you go down to Network Adapters – click on it. Select “Next”, then.
7. Then when it asks you to select manufacturer:
- Windows 7: select “Microsoft Corporation” (do not select "Microsoft")
- Windows 8 and 10: select "Microsoft"
8. Then select “Remote NDIS Compatible Device”.

9. Select “Next”. It will say it is not safe, etc. Ignore this. Proceed to install it. Windows should show a message about successful update. Close it. “RNDIS” should appear now below Network adapters.
10. Next install a Terminal application and enable Telnet. There are two options (in case of Windows 10):
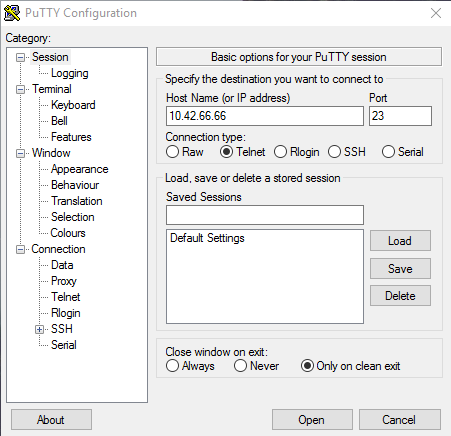
a) Install Putty. Download it from www.putty.org > "Download PuTTY" which currently points to http://www.chiark.greenend.org.uk/~sgtatham/putty/latest.html. Select "putty.exe" under "Alternative binary files" (make sure you take either the 32-bit or the 64-bit version, depending on your Windows architecture).
b) In case of Windows 10 it is possible to enable the actual Telnet (instead of installing Putty) and run it from the default CMD terminal of Windows (or from PowerShell). This can be done in "Control panel > Programs > Programs and Features" by clicking at "Turn Windows features on or off" (visible on the left) and then setting the check mark for "Telnet client" in the list. Click OK to confirm. Done.
11. Launch either a) the Putty application or b) the CMD terminal on the PC. Take a) or b) below.
a) On the first screen of Putty select Telnet as the Connection type (default is SSH) and then enter and set Host Name (IP address) to 10.42.66.66. See the picture below. Click Open.
b) In the CMD terminal type "telnet 10.42.66.66" (without the quotes).
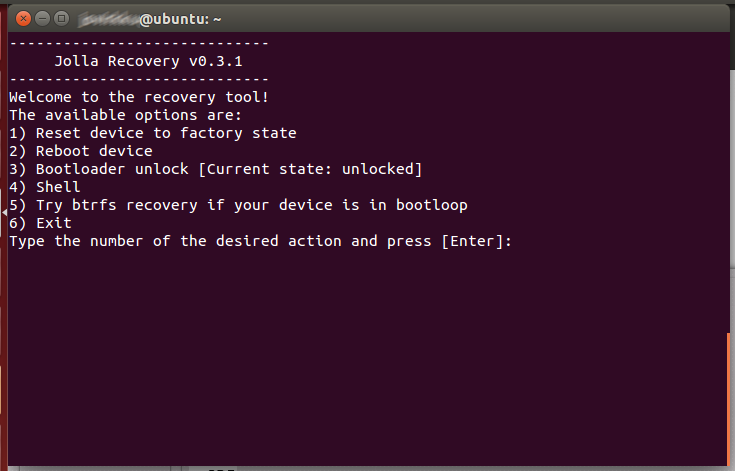
12. You should now see the black Recovery Mode menu on your computer screen (picture below):
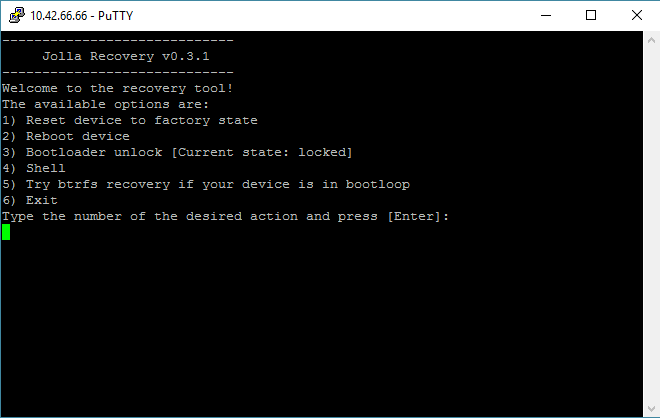
This signifies that you are ready to perform a fix by using Recovery Mode.
Below is a video of setting up Recovery Mode with a Windows PC:
To download the video, click here.
You are now ready to move to Chapter 3 Fixing your device with Recovery Mode
2.3 Preparing your Mac (OS X) computer for Recovery Mode
To run the Recovery Mode on a Mac computer, you need to download the HoRNDIS driver but all other software is already on your computer. You must use version 9 (or later) of HoRNDIS driver.
Citation of proof of https://joshuawise.com/horndis:
"Versions 10.11 and newer of Mac OS X have a rewritten USB stack that is substantially less compatible than that in 10.10 and below. HoRNDIS 9.0 has been rewritten to support MacOS 10.11 and above (El Capitan, Sierra, High Sierra and Mojave); for those versions of MacOS, please try the latest version of HoRNDIS! "
1. Browse to www.joshuawise.com/horndis
2. Download and install the latest version of the HoRNDIS driver.
3. After installing the driver you may be prompted to perform a system restart and receive a notification about a "Kernel extension not from an identified developer":
Please click OK on the pop-up and restart your computer if you are unsure should you do so or not.
4. Once the driver is installed, attach your Jolla to your Mac. (Note: Jolla must be in "Recovery Mode" before attaching the cable, see chapter 2.1)
5. Next you need to locate the Terminal application. To do so:
5a Open Finder
5b Click the tab "Applications" and open "Utilities"
5c Double-click the Terminal icon to launch it.

6. Once Terminal is open, select Shell > "New Remote Connection..."
7. Click on "Remote Login (telnet)" and then the + -icon to add a server.

8. Type in the address: 10.42.66.66 and press "OK".

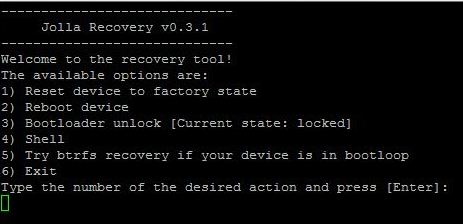
9. You should now be in Recovery Mode, with the Recovery Mode menu visible on your computer screen:
You are now ready to move to Chapter 3 Fixing your device with Recovery Mode
2.4 Preparing your Linux PC for Recovery Mode
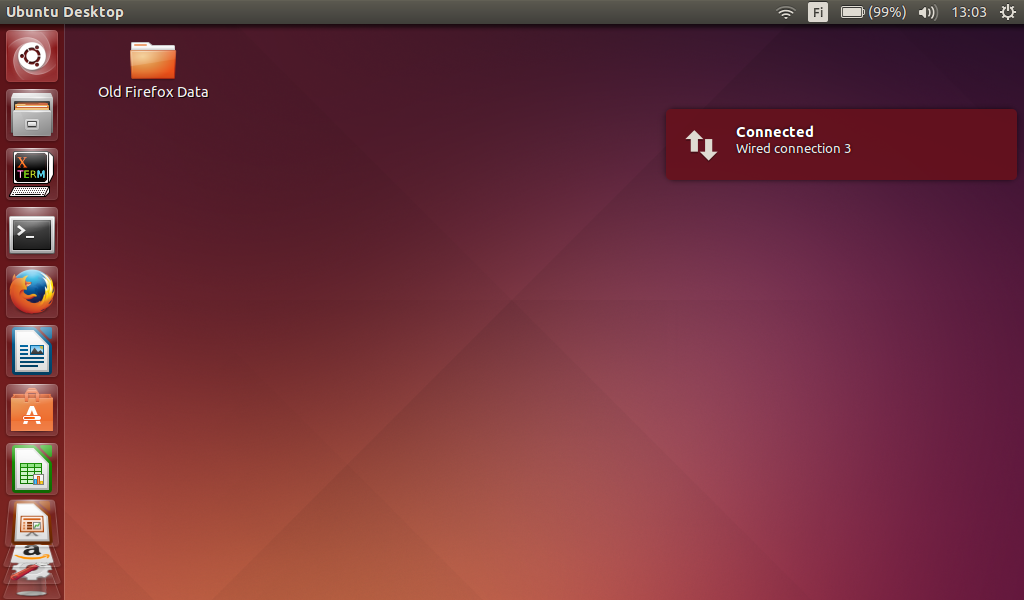
It is likely that you won't need to download any additional software to use Recovery Mode. Below we've used Ubuntu.
1.) Connect your Jolla to your PC. You will likely see a notification relating to a disconnect/connect and Ethernet/Wired connection:
2.) Open the Terminal application
3.) Type into the Terminal:
telnet 10.42.66.66
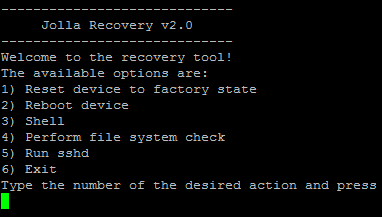
4.) You should now see the Recovery Mode menu:
You are now ready to move to Chapter 3 Fixing your device with Recovery Mode
3 Fixing your device with Recovery Mode
Please perform all the actions described in the following chapters 3.1, 3.2 and 3.3.
Using Copy-Paste with Shell commands
In the instructions below you may have to enter specific commands into the Shell of Recovery mode. To successfully copy-paste from this article into Shell, please do the following:
- "Paint" (select) the command on this page.
- Copy the command to the clipboard either by using your mouse or a keyboard combination (Windows: ctrl + c / Mac: command key (⌘) + C).
- In shell, simply (right) click to paste text.
- Execute the command by pressing Enter.
3.1 Backing up your data using Recovery Mode
It is possible to attempt to save some data from your device using function nr. 4 ("Shell") in Recovery Mode. For this operation you will need a MicroSD card.
To learn about saving some of your data through the Recovery Mode, please read this article.
3.2 Resetting phone to factory settings in Recovery Mode
NOTE: this option deletes ALL data from your device. Read here about saving data in Recovery Mode. Resetting to factory settings does not affect data on the SD (memory card) and SIM cards, however.
1. Prepare your PC and Jolla phone for Recovery Mode (as described in Chapter 2), until you see the Recovery Menu:
2. In the Recovery Mode menu take option #1 "Reset device to factory state"
Note: If your terminal application suddenly disappears when attempting to run this function, simply connect to Recovery Mode again, and go straight to performing the Device Reset. You may have to repeat this a number of times.
3. Give the process some time to run and follow on-screen instructions.
Please see attachment "Successful Factory Reset in Recovery Mode" to see how the reset is supposed to go.
When the process has completed, please refer to the next chapter to correctly revert your phone from Recovery Mode back to normal state.
3.3 Reverting phone back to normal state
It is crucial to follow the below steps to successfully revert your phone from Recovery Mode back to normal state:
1. Select option 6 'Exit' in the Recovery Mode menu.
2. Disconnect the USB cable from the phone.
3. Detach the battery from the phone.
4. Attach the battery.
5. Turn the phone on. It is now back in the normal state.
Please read this general article about factory reset. In particular, read what is recommended after the factory reset, as explained in chapter "First actions after the reset"
4 Troubleshooting / FAQ
Q: I followed the instructions above but Recovery Mode wasn't able to fix my device, or it produced some odd errors along the way. What can I do?
A: Please follow our instructions for Recovery Mode one more time. This time try to document the different steps of you following the instructions. Please take screenshots or in the best case create a screencast of you following the Recovery Mode instructions. Then, contact us and attach to your message these files.
Q: I don't want to reset my device, is there any other fix I could perform?
A: At the moment only the "Device Reset" function works as expected. Using any other fix you risk further damaging your device's software to a state, where even device reset does not work.
To save some of your data before performing the reset, please read this support article!
Q: When trying to connect to Recovery Mode using Putty (SSH), I get an error! / Putty closes immediately after connecting device!
A: If this step fails, it may be necessary to re-install the drivers as described in the Chapter 2. Especially Windows appears to lose the necessary drivers sometimes, and that's why you might have to reinstall them.
If the above doesn't solve your issue, please re-visit chapter 2.1 Preparing your Jolla for Recovery Mode and ensure that your Jolla is able to reach the Recovery Mode state normally. If it seems it can't, please contact Jolla Service & Support.
Q: When trying to use option #1 "Reset device to factory settings" in the Recovery Mode menu the process halts at "Mounting /dev/mmcblk0p28 on /mnt".
A: The file system (btrfs) is most likely corrupted. Let's try to heal it:
- Enter the Recovery mode and select "4. Shell" in the main menu.
- Run command:
btrfs check --repair /dev/mmcblk0p28 - Start recovery mode again with command
/usr/bin/recovery-menu - Try the factory reset again by selecting option "1. Reset device to factory state".
Q: When trying to use option #1 "Reset device to factory settings" in the Recovery Mode menu I get the warning "The flashed recovery image is too old".
A: This can happen with a very old Sailfish OS releases (earlier than 1.1.2.16). Please follow the specific instructions below (in blue text).
Very Old Sailfish OS version: Resetting phone to factory settings in Recovery Mode
For this operation, you will need a memory card to perform a device reset. Read this article on compatible SD cards.
NOTE: this option deletes ALL data from your device. Read here about saving data in Recovery Mode. Resetting to factory settings does not affect data on the SD (memory card) and SIM cards, however.
1. Download the "recovery-menu" file attached to this article (~19.8Kb), and save it on your PC.
2. Then, copy the file on to your SD card (to the top-most directory) and place the card inside your Jolla.
3. Prepare your PC and device for Recovery Mode (as described in Chapter 2), until you see the Recovery Menu:
4. Select option "4) Shell". Answer "Y" to the question it asks you.
5. Then, please copy-paste these lines (one line at a time) into Shell:
mkdir -p /mysd
mount /dev/mmcblk1p1 /mysd
Note: you can paste a line into shell by clicking the right-mouse button. After pasting you must execute the command by pressing Enter.
6. Then, copy-paste these lines (one line at a time) into Shell:
cp -f /mysd/recovery-menu /usr/bin/recovery-menu
umount /mysd
7. Copy-paste two more lines (one line at a time) into Shell:
mount -t btrfs -o skip_balance /dev/mmcblk0p28 /mnt/
/usr/bin/recovery-menu
8. The Recovery Mode menu should appear now. Take option #1 "Reset device to factory state"
Note: If your terminal application suddenly disappears when attempting to run this function, simply connect to Recovery Mode again, and go straight to performing the Device Reset (i.e. you need not copy the recovery-menu file again). You may have to repeat this a number of times.
9. Give the process some time to run and follow on-screen instructions.