This article will assist you in making all the necessary preparations for Recovery Mode as well as using Recovery Mode.
NOTE: This article is for Jolla Tablet only. There are separate articles for other Sailfish devices:
- Xperia 10 II and Xperia X 10 III: https://docs.sailfishos.org/Support/Help_Articles/Recovery_Mode/
- Xperia X, XA2, 10: https://jolla.zendesk.com/hc/en-us/articles/360002996893
- Jolla C & Aqua Fish: https://jolla.zendesk.com/hc/en-us/articles/115000663928
- Jolla Phone: https://jolla.zendesk.com/hc/en-us/articles/204709607
CONTENTS
1 What is Recovery Mode?
1.1 When might I need the Recovery Mode?
2 Setting up Recovery Mode for the first time
2.1 Preparing your Jolla Tablet for Recovery Mode
2.2 Preparing your Windows laptop for Recovery Mode
2.3 Preparing your Mac (OS X) computer for Recovery Mode
2.4 Preparing your Linux PC for Recovery Mode
3 Fixing your device with Recovery Mode
3.1 Using Copy-Paste with Shell commands
1 What is Recovery Mode?
The Recovery Mode is a tool built-in to the Jolla Tablet that allows you to recover your device from a critical or unusable state.
1.1 When might I need the Recovery Mode?
Below are example cases where you could need to use the Recovery Mode:
- If your Jolla Tablet isn't starting up normally or at all, or for some reason, you can't perform a device reset via the normal means in Settings, you can maybe do it in Recovery Mode.
- Recovery Mode allows you to enter commands to the Tablet via the command line ("Shell") even if the device doesn't startup.
- You can check the filesystem for errors and let Recovery Mode automatically correct them. With this, you can fix instability and errors in the operating system and applications.
2 Setting up Recover Mode for the first time
These instructions are for setting your Windows-, Mac- or Linux PC up to be able to use Recovery Mode and to teach you how to put your Jolla Tablet into a suitable mode for Recovery Mode.
2.1 Preparing your Jolla Tablet for Recovery Mode
1. Switch off your Jolla Tablet
2. Press and hold the Volume Down & Power buttons. Keep them held down until you see a Jolla logo on the display of your device.
3. In a moment you will see a view that reads "Droidboot", and a menu with the selection "Recovery". Move the selector to "Recovery" by using the volume keys. Confirm your selection by pressing the Power key.
4. Soon the text "RECOVERY: Connect USB cable and open telnet connection to address 10.42.66.66" will appear on your Tablet's screen.
Your Tablet is now ready for Recovery Mode.
If you know that the RNDIS driver of your Windows computer is installed, please jump to step 10 in chapter 2.2 (the next chapter). If you do not know, continue to chapter 2.2. (right below).
2.2 Preparing your Windows laptop for Recovery Mode:
Do the following to install the “RNDIS drivers” and the terminal application properly (if you have not used Recovery mode before):
1. Connect your Jolla Tablet to your PC with a USB-cable.
2. Launch Windows Start Menu and right click on “Computer”. Select “Manage”.
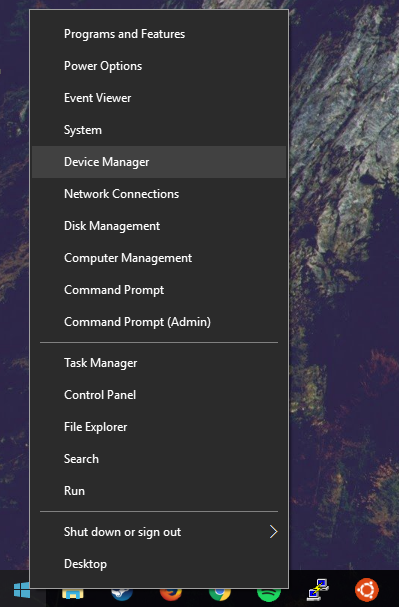
Windows 10: Launch Windows Start Menu, type 'device manager'. Now you should see Device Manager in the search list or
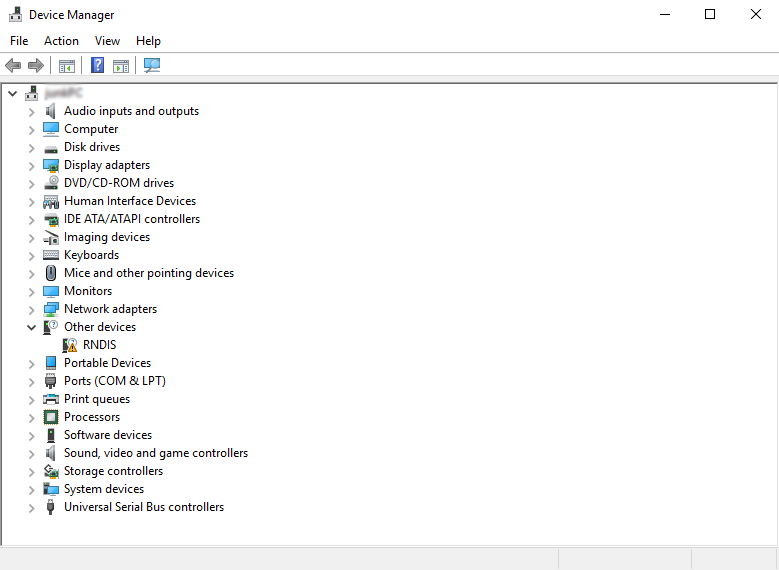
3. Left-click on Device Manager and find the Device "RNDIS" under “Other Devices”, equipped with a small triangle. If you do not see it listed, then ensure that you have the item "Remote NDIS compatible device" under "Network adapters" (this implies that the driver should be ok on your computer).
NOTE: Windows keep developing. It may be that you won't find either "RNDIS" or "Remote NDIS compatible device" in the Device Manager of your Windows 10 computer (and who knows about Win 11) - this happened to the author when using Windows 10.0.19043, feature update 21H1 and cumulative update 21H1. In such a case, proceed to steps 10 or 11 below and try your luck with the telnet command. It worked like a charm for the author.
4. Right click on that device and select Update Driver Software. 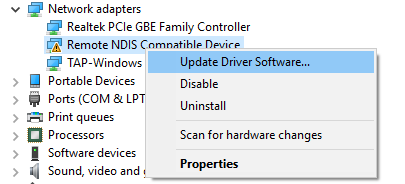
5. When the window pops up (Windows 7 and 8 and 10) select “Browse My Computer” for driver software, then on the next screen, click on the bottom that says “Let me pick from a list of drivers on my computer”.
6. Next, you will be asked for the device type. Here you go down to "Network Adapters" – click on it. Select “Next”, then.
7. Then, when it asks you to select the manufacturer:
a) on Windows 7: select “Microsoft Corporation”
b) on Windows 8 & 10: select “Microsoft”.
8. Then, select “Remote NDIS Compatible Device”. 
9. Select “Next”. It will show a warning on the driver update not being safe, etc. Ignore this. Proceed to install it. Windows should show a message about successful update. Close it. “RNDIS” should appear now below Network adapters.
10. Now, install Putty to serve as a Terminal application. Download it from www.putty.org > "Download PuTTY" which currently points to http://www.chiark.greenend.org.uk/~sgtatham/putty/latest.html. Select "putty.exe" under "Alternative binary files" (make sure you take either the 32-bit or the 64-bit version, depending on your Windows architecture).
11. Launch Putty application on the PC. On the first screen of Putty select Telnet as the Connection type (default is SSH) and then enter and set Host Name to 10.42.66.66. Click Open: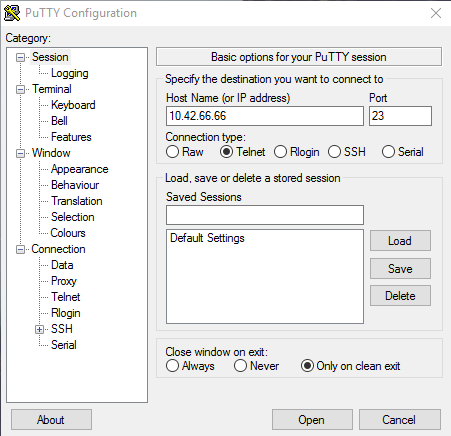
12. You should now see the black Recovery Mode menu on your computer screen:
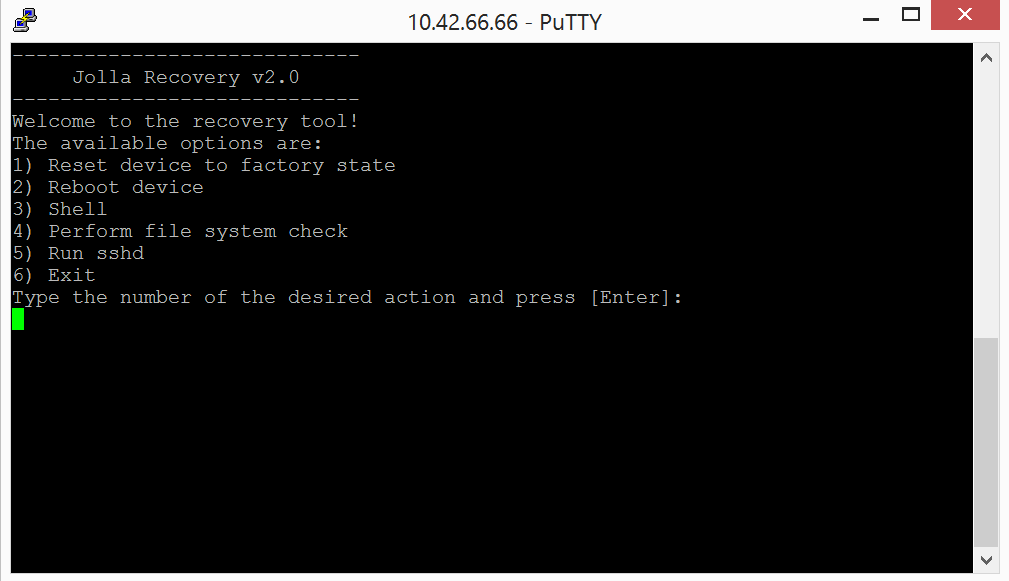
This signifies that you are ready to perform a fix by using Recovery Mode.
2.3 Preparing your Mac (OS X) computer for Recovery Mode
To run the Recovery Mode on a Mac computer, you need to download the HoRNDIS driver but all other software is already on your computer. You must use version 9 (or later) of HoRNDIS driver.
Citation of proof of https://joshuawise.com/horndis:
"Versions 10.11 and newer of Mac OS X have a rewritten USB stack that is substantially less compatible than that in 10.10 and below. HoRNDIS 9.0 has been rewritten to support MacOS 10.11 and above (El Capitan, Sierra, High Sierra and Mojave); for those versions of MacOS, please try the latest version of HoRNDIS!"
1. Browse to www.joshuawise.com/horndis
2. Download and install the latest version of the HoRNDIS driver.
3. After installing the driver you may be prompted to perform a system restart and receive a notification about a "Kernel extension not from an identified developer":

Please click OK on the pop-up and restart your computer if you are unsure should you do so or not.
4. Once the driver is installed, attach your Jolla to your Mac. (Note: Jolla must be in "Recovery Mode" before attaching the cable, see chapter 2.1)
5. Next you need to locate the Terminal application. To do so:
5a Open Finder
5b Click the tab "Applications" and open "Utilities"
5c Double-click the Terminal icon to launch it.

6. Once Terminal is open, select Shell > "New Remote Connection..."
7. Click on "Remote Login (telnet)" and then the + -icon to add a server.

8. Type in the address: 10.42.66.66 and press "OK".

9. You should now be in Recovery Mode, with the Recovery Mode menu visible on your computer screen.
2.4 Preparing your Linux PC for Recovery Mode
It is likely that you won't need to download any additional software to use Recovery Mode. Below we've used Ubuntu.
1.) Connect your Jolla Tablet to your PC. You will likely see a notification relating to a disconnect/connect and Ethernet/Wired connection:
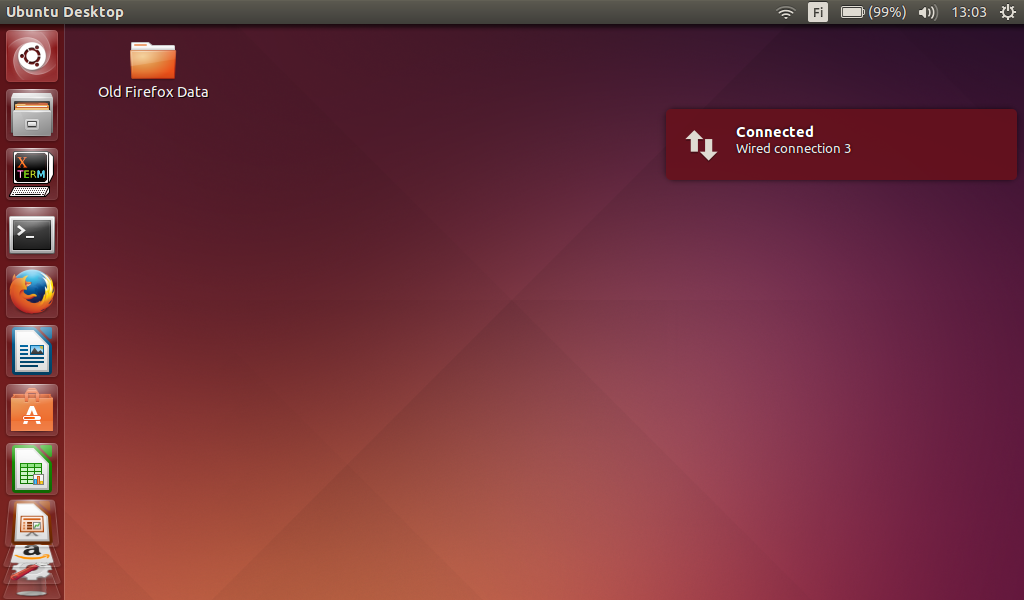
2.) Open the Terminal application
3.) Type into the Terminal:
telnet 10.42.66.66
4.) You should now see the Recovery Mode menu on your computer screen.
3 Fixing your device with Recovery Mode
Now that your Jolla Tablet and your computer are set up for Recovery Mode, you are ready to run one of the Recovery Mode's functions:
1) "Reset device to factory state": the device is returned to factory settings and all data on the device (pictures, videos, applications, settings...) is removed as well as downloaded software updates.
This function wipes the device clean of data. Whether perfroming a backup before this operation via normal means isn't possible or fails, you can try backing up data in the Shell of Recovery Mode.
2) "Reboot device": the device is simply restarted.
3) "Shell": the command line which in itself is not a fix. It allows controlling the Jolla Tablet via textual commands, even if the device doesn't start up.
4) "Perform file system check": checks the filesystem for errors and lets Recovery Mode automatically correct them. With this you can fix instability and errors in the operating system and applications.
This function does not delete any data from the device.
5) "SSHD": allows commands to be entered into Recovery Mode via SSH-connections.
6) "Exit": whenever you stop using Recovery Mode, you should close it by using this function. After using this function, remove the USB cable and start your Tablet normally.
3.1 Using Copy-Paste with Shell commands
You may receive specific commands from Jolla Service & Support to enter specific commands into the Shell of Recovery mode. As every character and space counts, we urge you to use copy-paste whenever possible:
- "Paint" (select) the command from our message.
- Copy the command to the clipboard either by using your mouse or a keyboard combination (Windows: ctrl + c / Mac: command key (⌘) + C).
- In shell, simply (right) click to paste text.
- Execute the command by pressing Enter.
4 Troubleshooting / FAQ
Q: I followed the instructions above but Recovery Mode wasn't able to fix my device, or it produced some odd errors along the way. What can I do?
A: Please follow our instructions for Recovery Mode one more time. This time try to document the different steps of you following the instructions. Please take screenshots or in the best case create a screencast of you following the Recovery Mode instructions. Then, contact us and attach to your message these files.